Bags Bags Bags
The quest for the perfect bike bag system
I started bikepacking in 2023 and quickly realized that most gear was either expensive or compromised—no single bag seemed to meet all my needs. That’s when I decided to start making my own. Since then, I’ve designed and built multiple iterations of bike bags, each tailored to the demands of my customers’ needs or my own.
Ideation
Every Bag Starts with a Need. A challenge. A problem. An idea.
From there, I sketch, prototype, and experiment— turning concepts into paper models, and eventually, into bags built for riding.

Sustainability as a Design Tool
Reclaimed materials are central to my prototyping process—they reduce waste, inspire creative solutions, and encourage more intentional design. By working with what's available, I can build and test quickly, fail fast, and learn early without the pressure of expensive materials. Many early bike bag prototypes were made from unconventional sources I’ve collected over time, including a discarded wing foil sail and technical fabric scraps from The Gear Fix and OSU’s Make Space.
Stem Bag
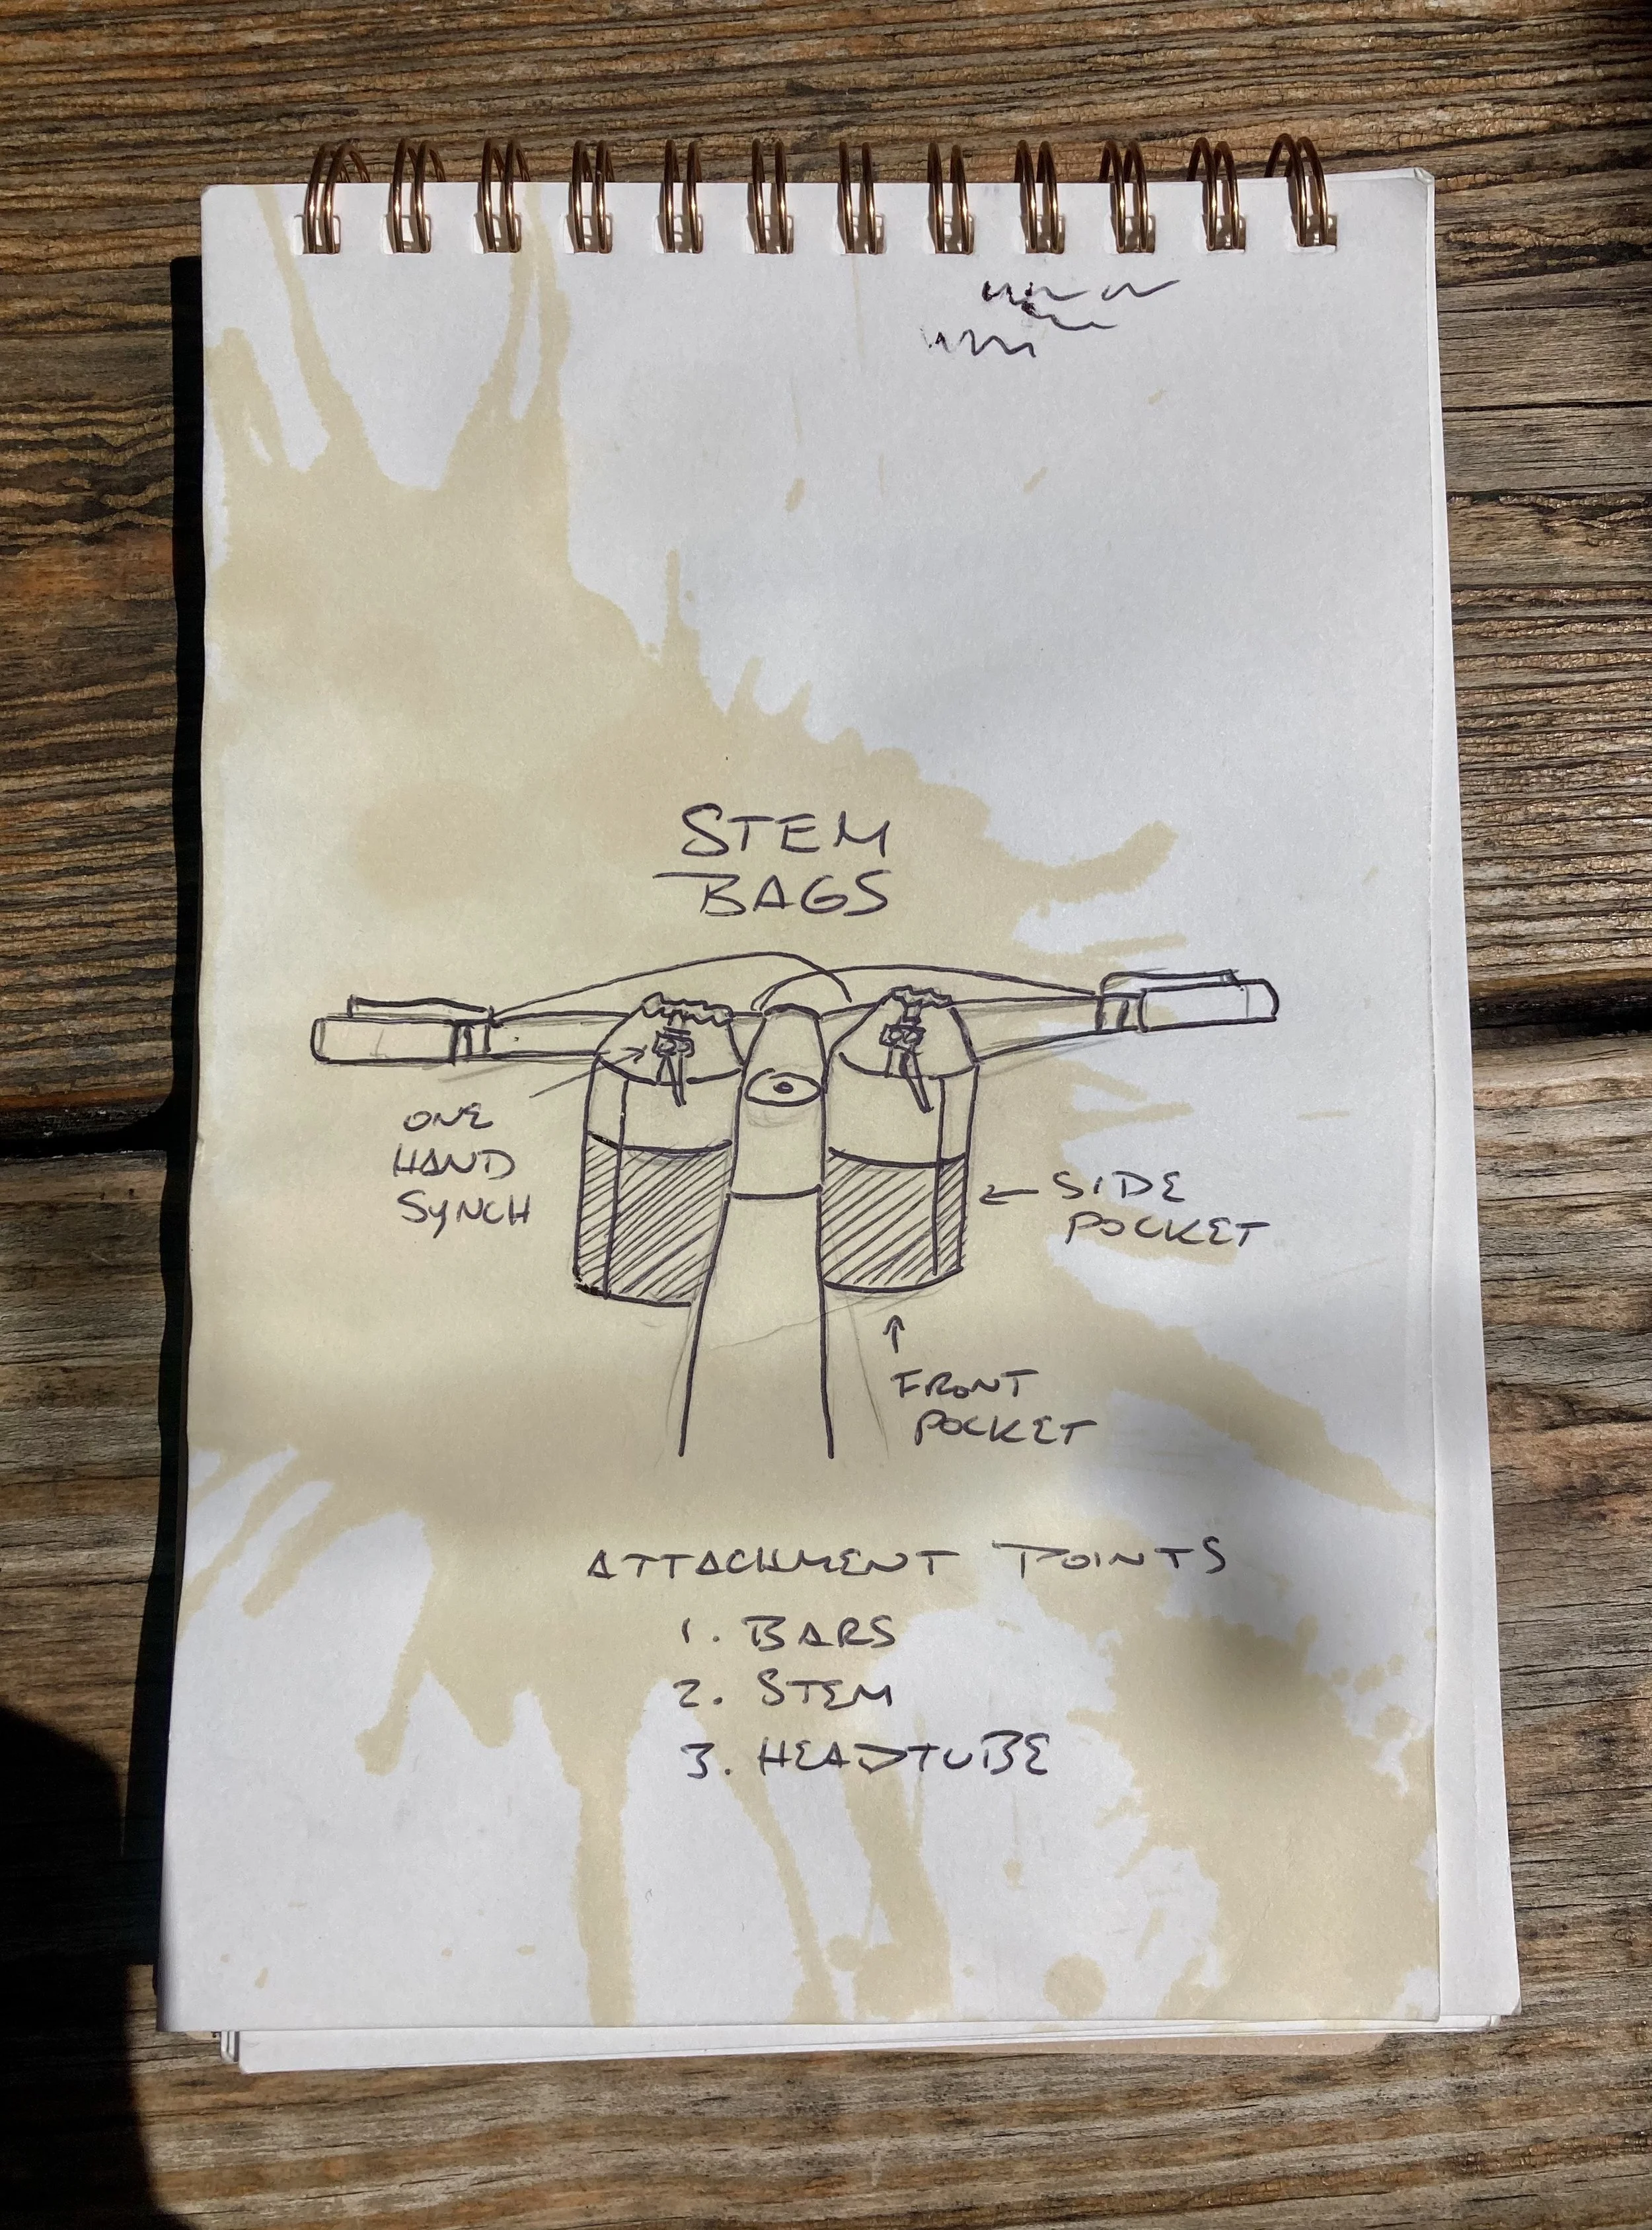
Easy access to snacks
Alternate bottle storage
Simple one-handed opening and closing
Concepts
Frame Bag
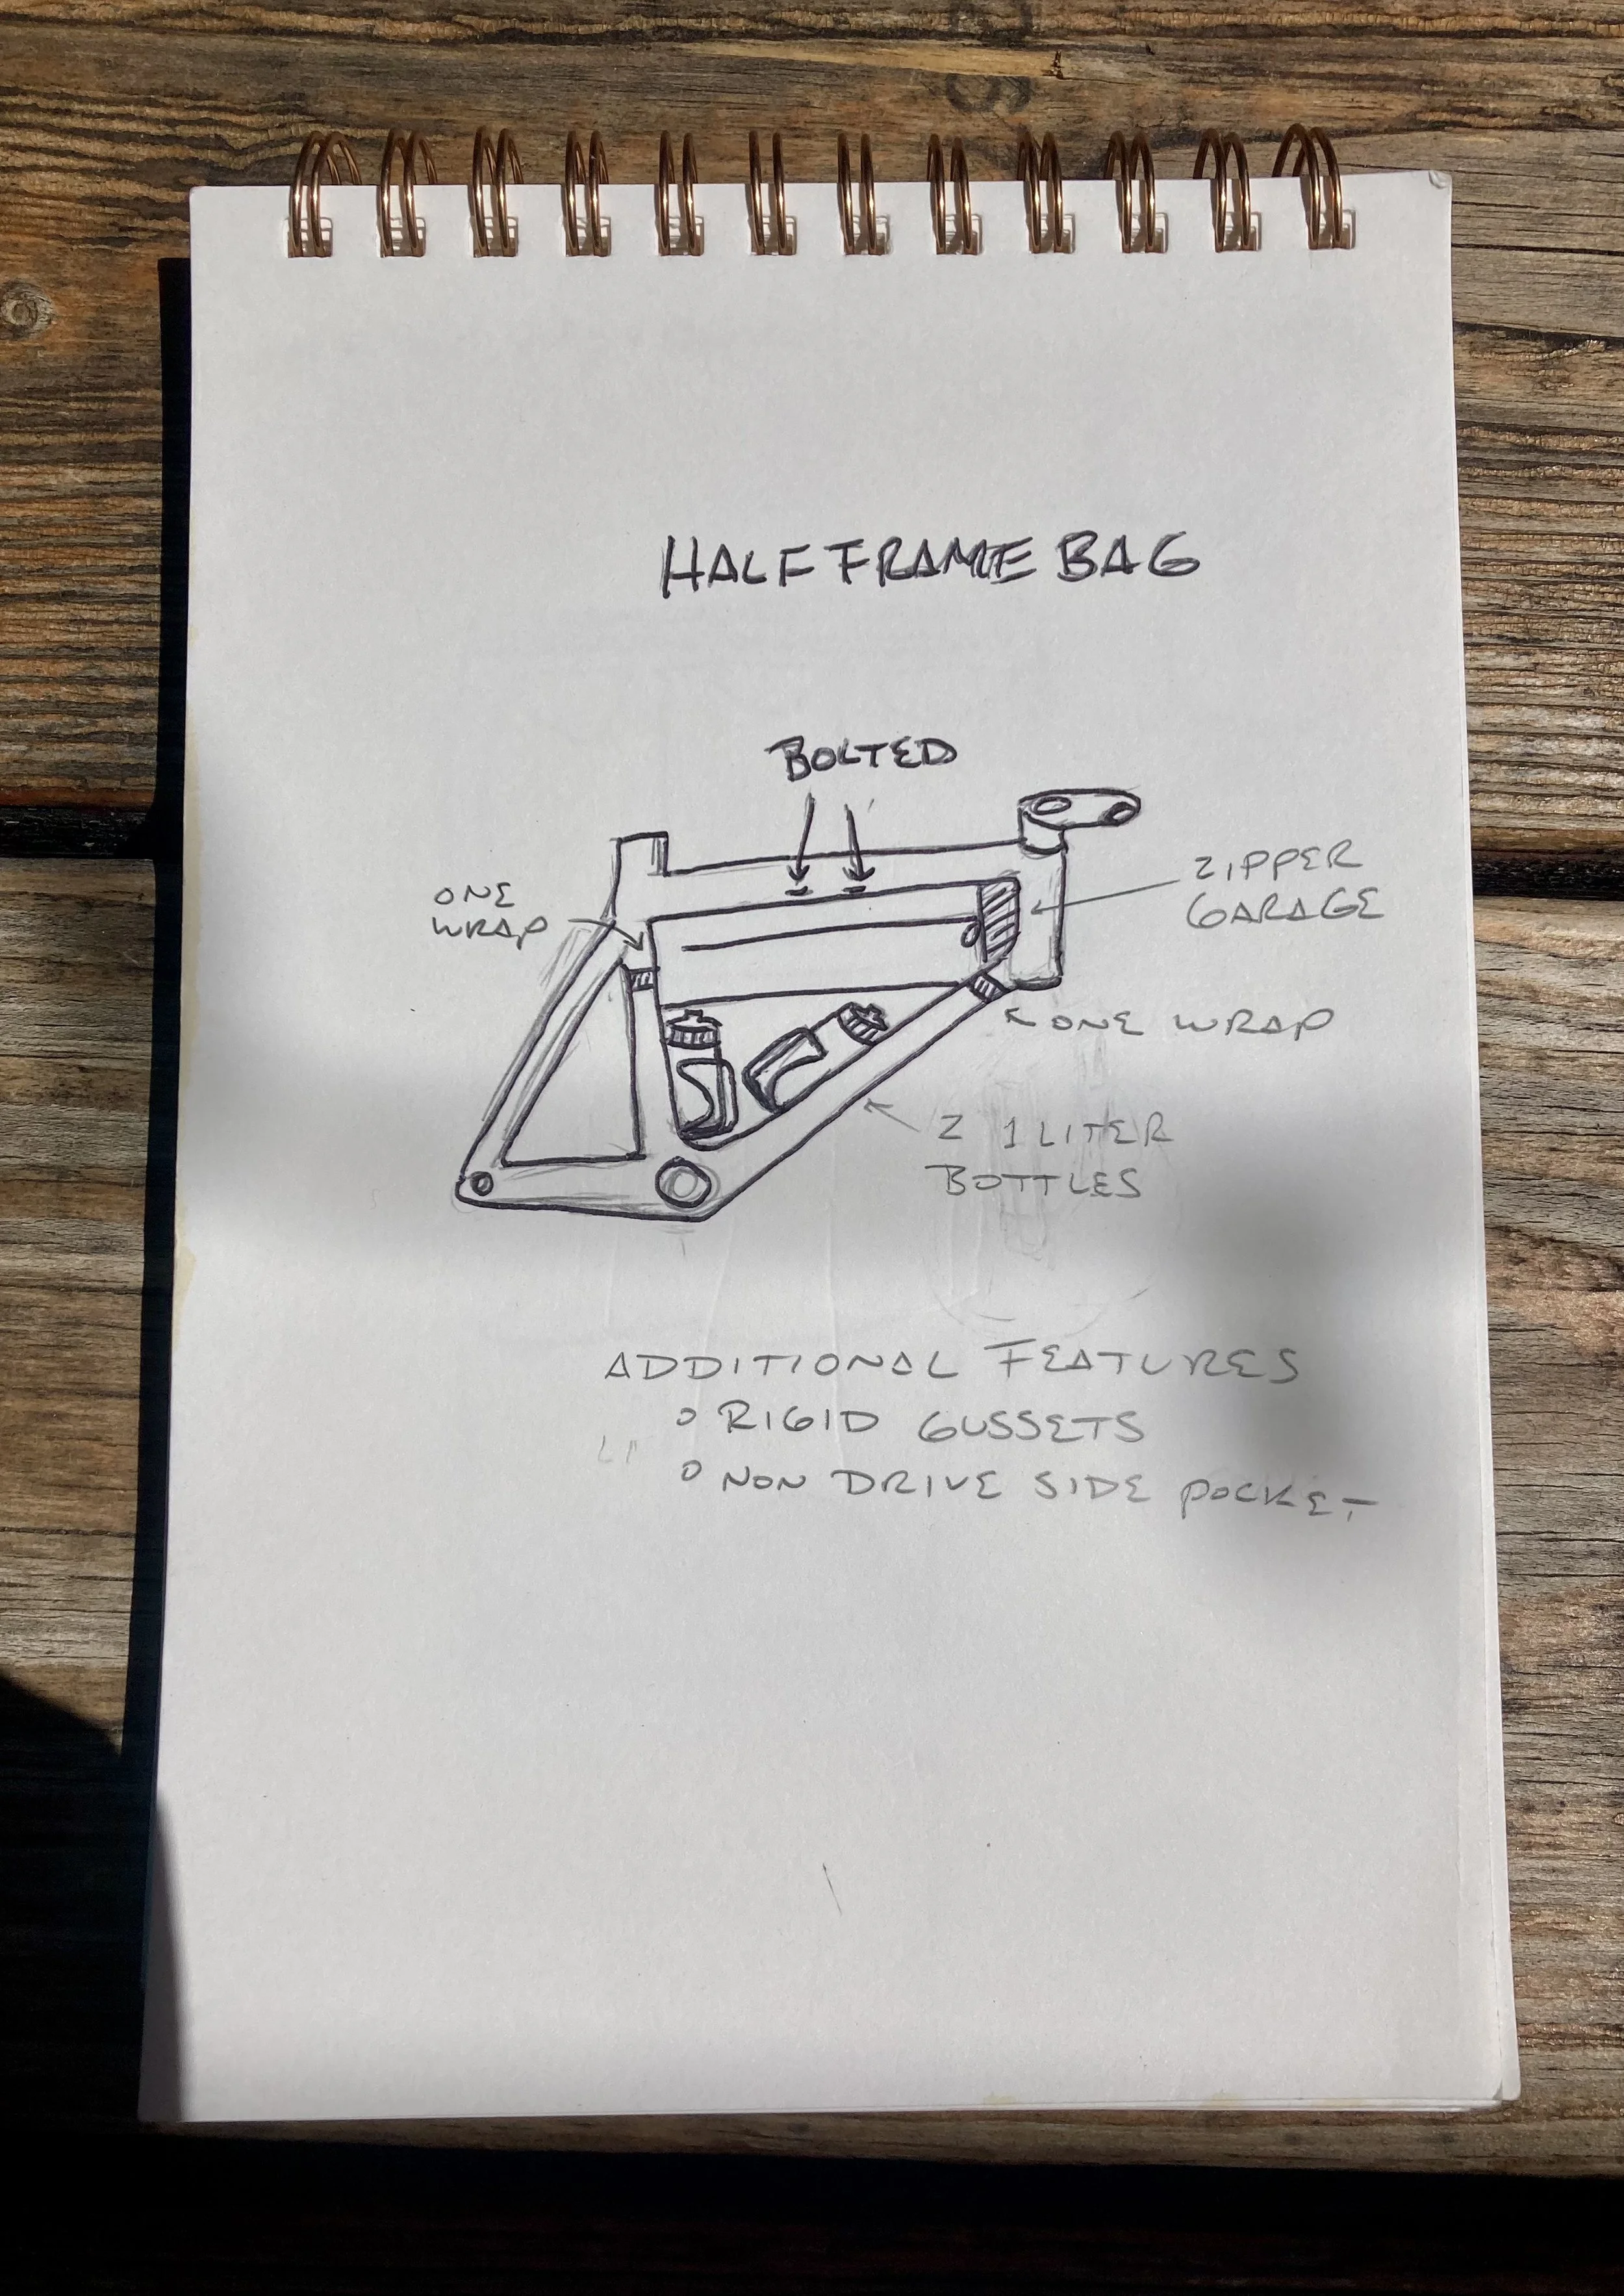
One of the main storage compartments
Holds items that would need to be accessed frequently
Could use bolts to mount the bag into the frame
Top Tube Bag
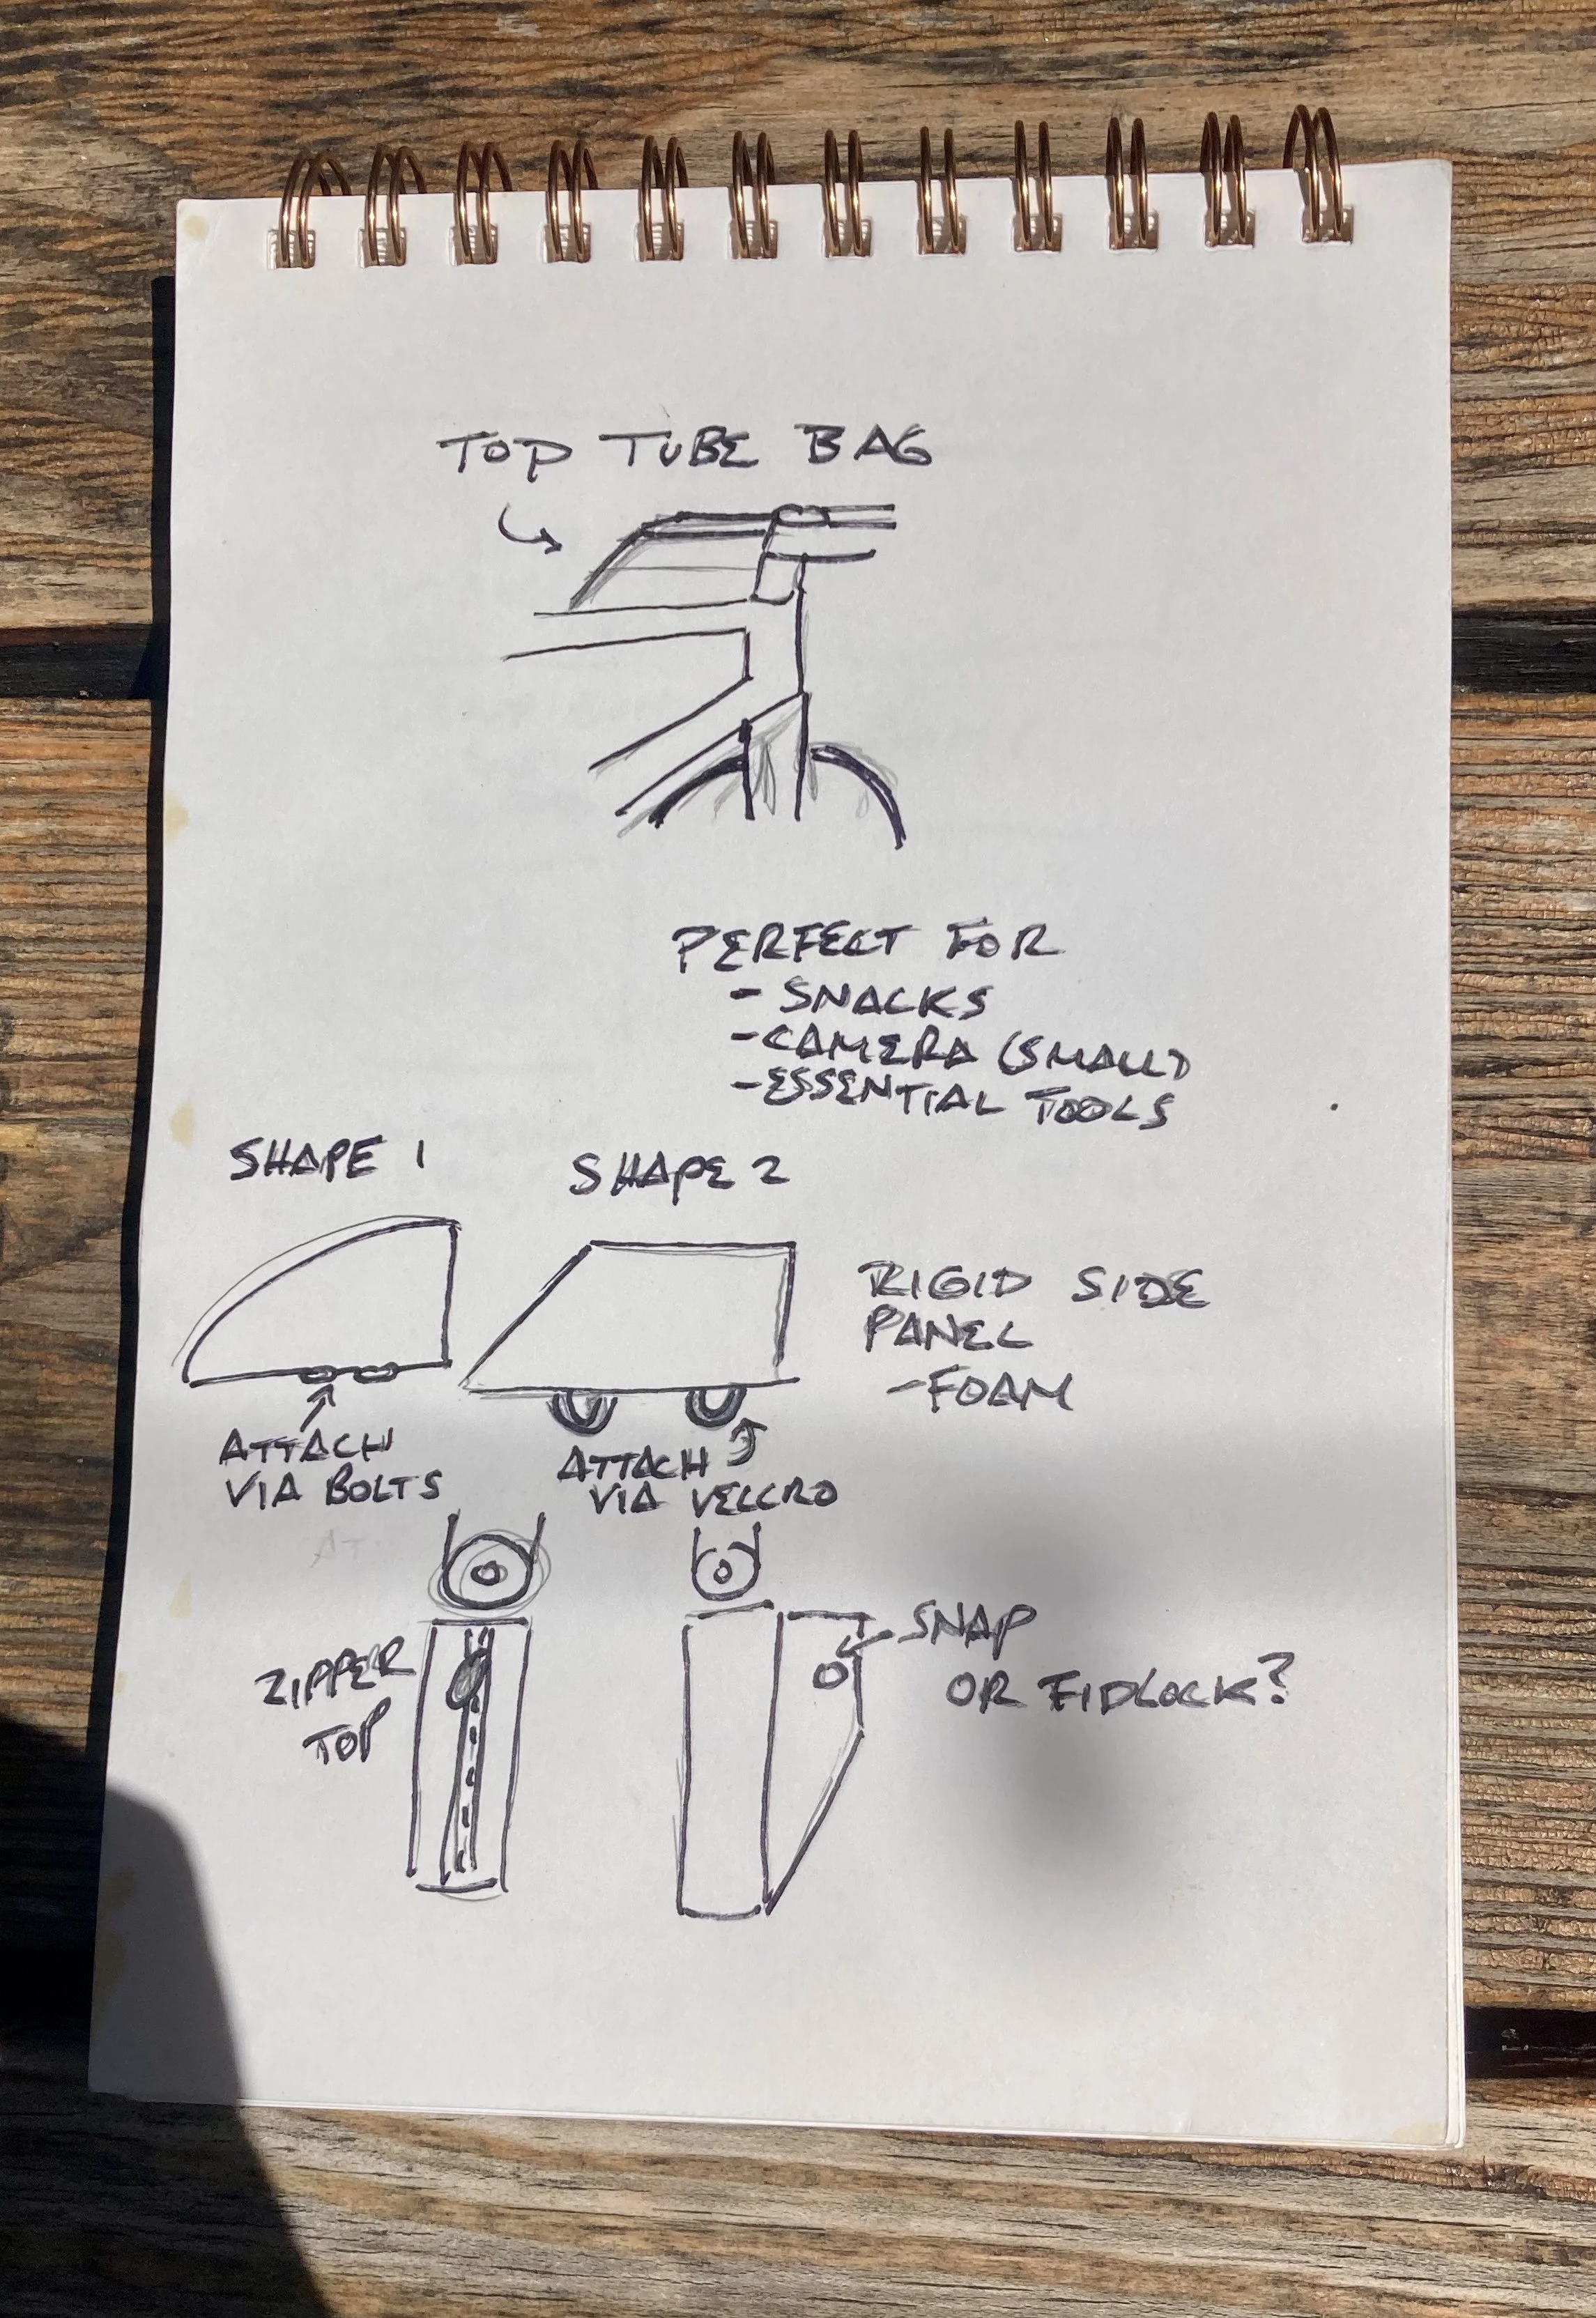
Space for more snacks
Could store a small camera, especially with padded sides
Rigid and aerodynamic
Testing
The fun part about making bags is putting them to the test. By using the bags I’ve made on all of my big rides, I’ve been able to understand what works and what doesn’t. Each time I ride with a new bag, I come home with new ideas for improvements, especially after long multi-day rides where I’m basically living out of these bags. Additionally, I try to get input from others by either loaning out the bags or making them a custom bag. It’s because of this feedback that I’ve been able to develop multiple iterations of the same bags.


Materials
Modern bike bags are typically constructed from advanced technical fabrics, while traditional designs relied on heavier materials like canvas. Technical textiles offer key advantages — they’re lighter, more durable, and often feature weather-resistant coatings that improve long-term performance.
When selecting materials, I focus on balancing durability, weight, and sustainability. The primary fabrics I use include:
X-Pac & Recycled X-Pac — versatile laminate fabrics that combine strength, rigidity, and waterproofing in a lightweight package.
Dyneema® — an ultralight fabric with exceptional tensile strength, ideal for minimizing weight without sacrificing performance.
Challenge Ultra — another ultralight, high-tensile fabric known for its tear resistance and sleek finish.
Cordura® — extremely tough and abrasion-resistant, perfect for high-wear zones or base panels.
Ripstop Nylon — used primarily for linings, offering lightweight tear resistance and a clean interior finish.
Since these fabrics are all synthetic and relatively costly, I prioritize material efficiency during prototyping — mixing and matching offcuts and fabric scraps to minimize waste and make the most of each purchase.
Frame Bags
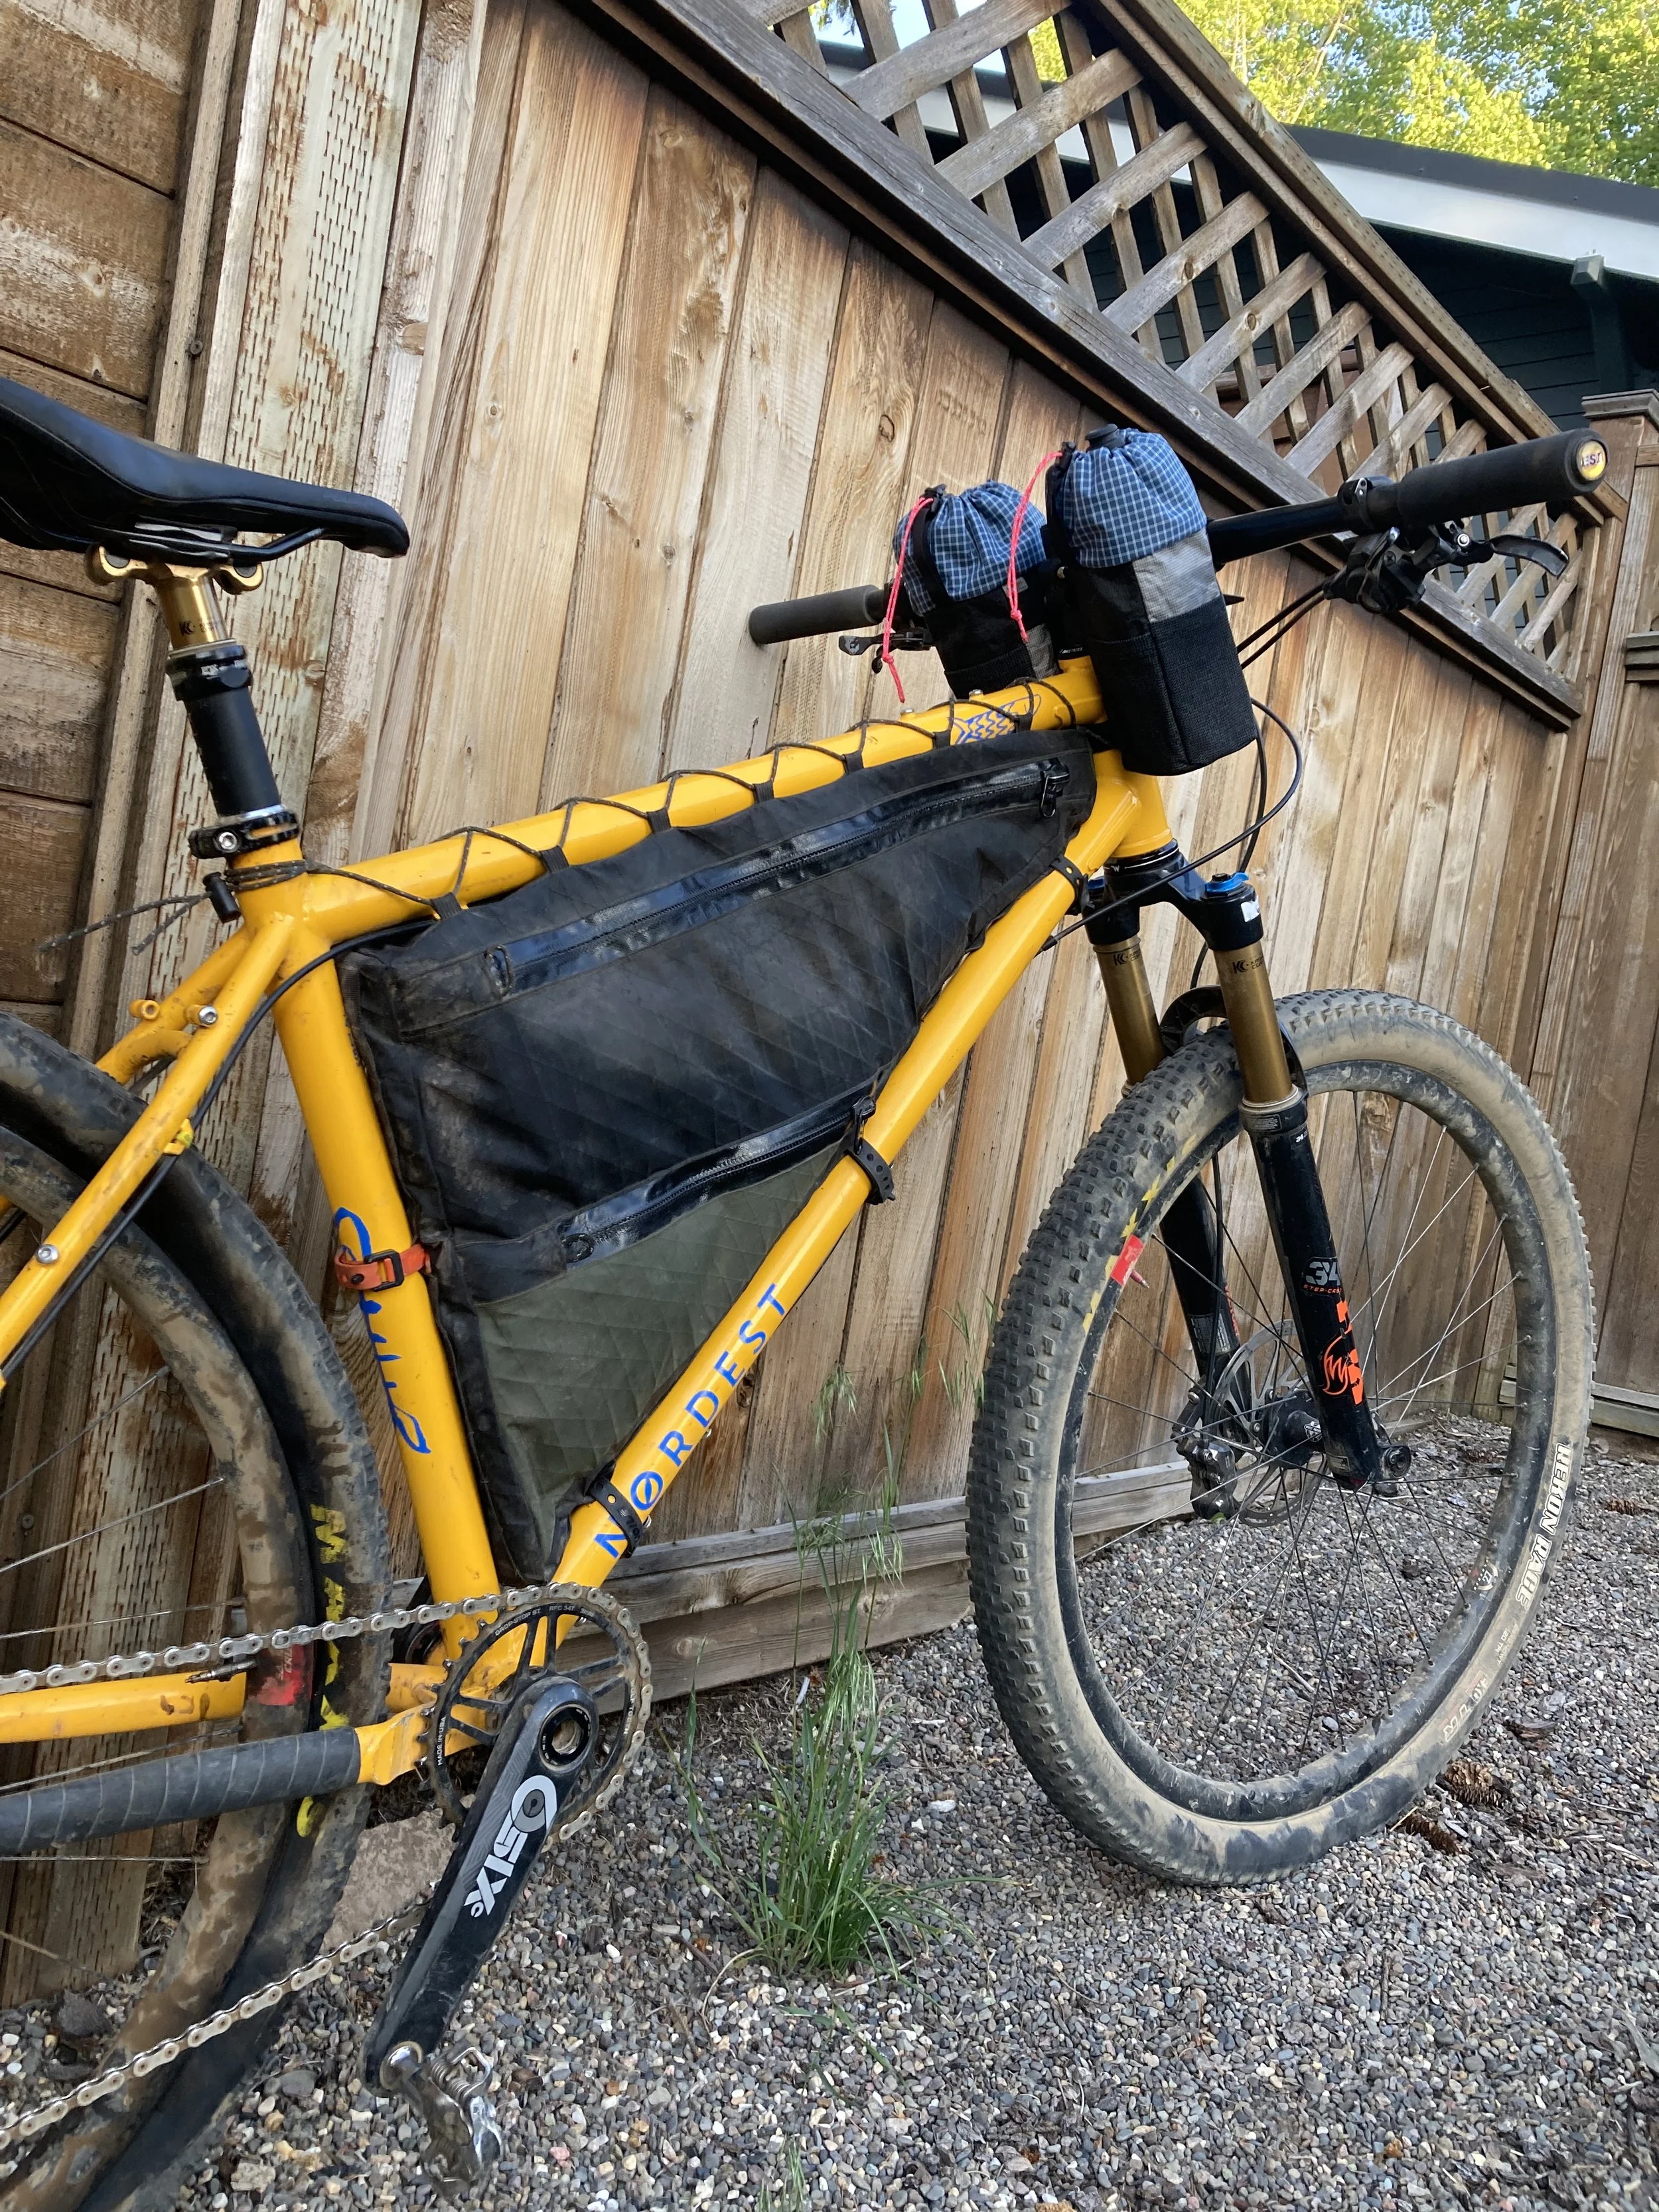
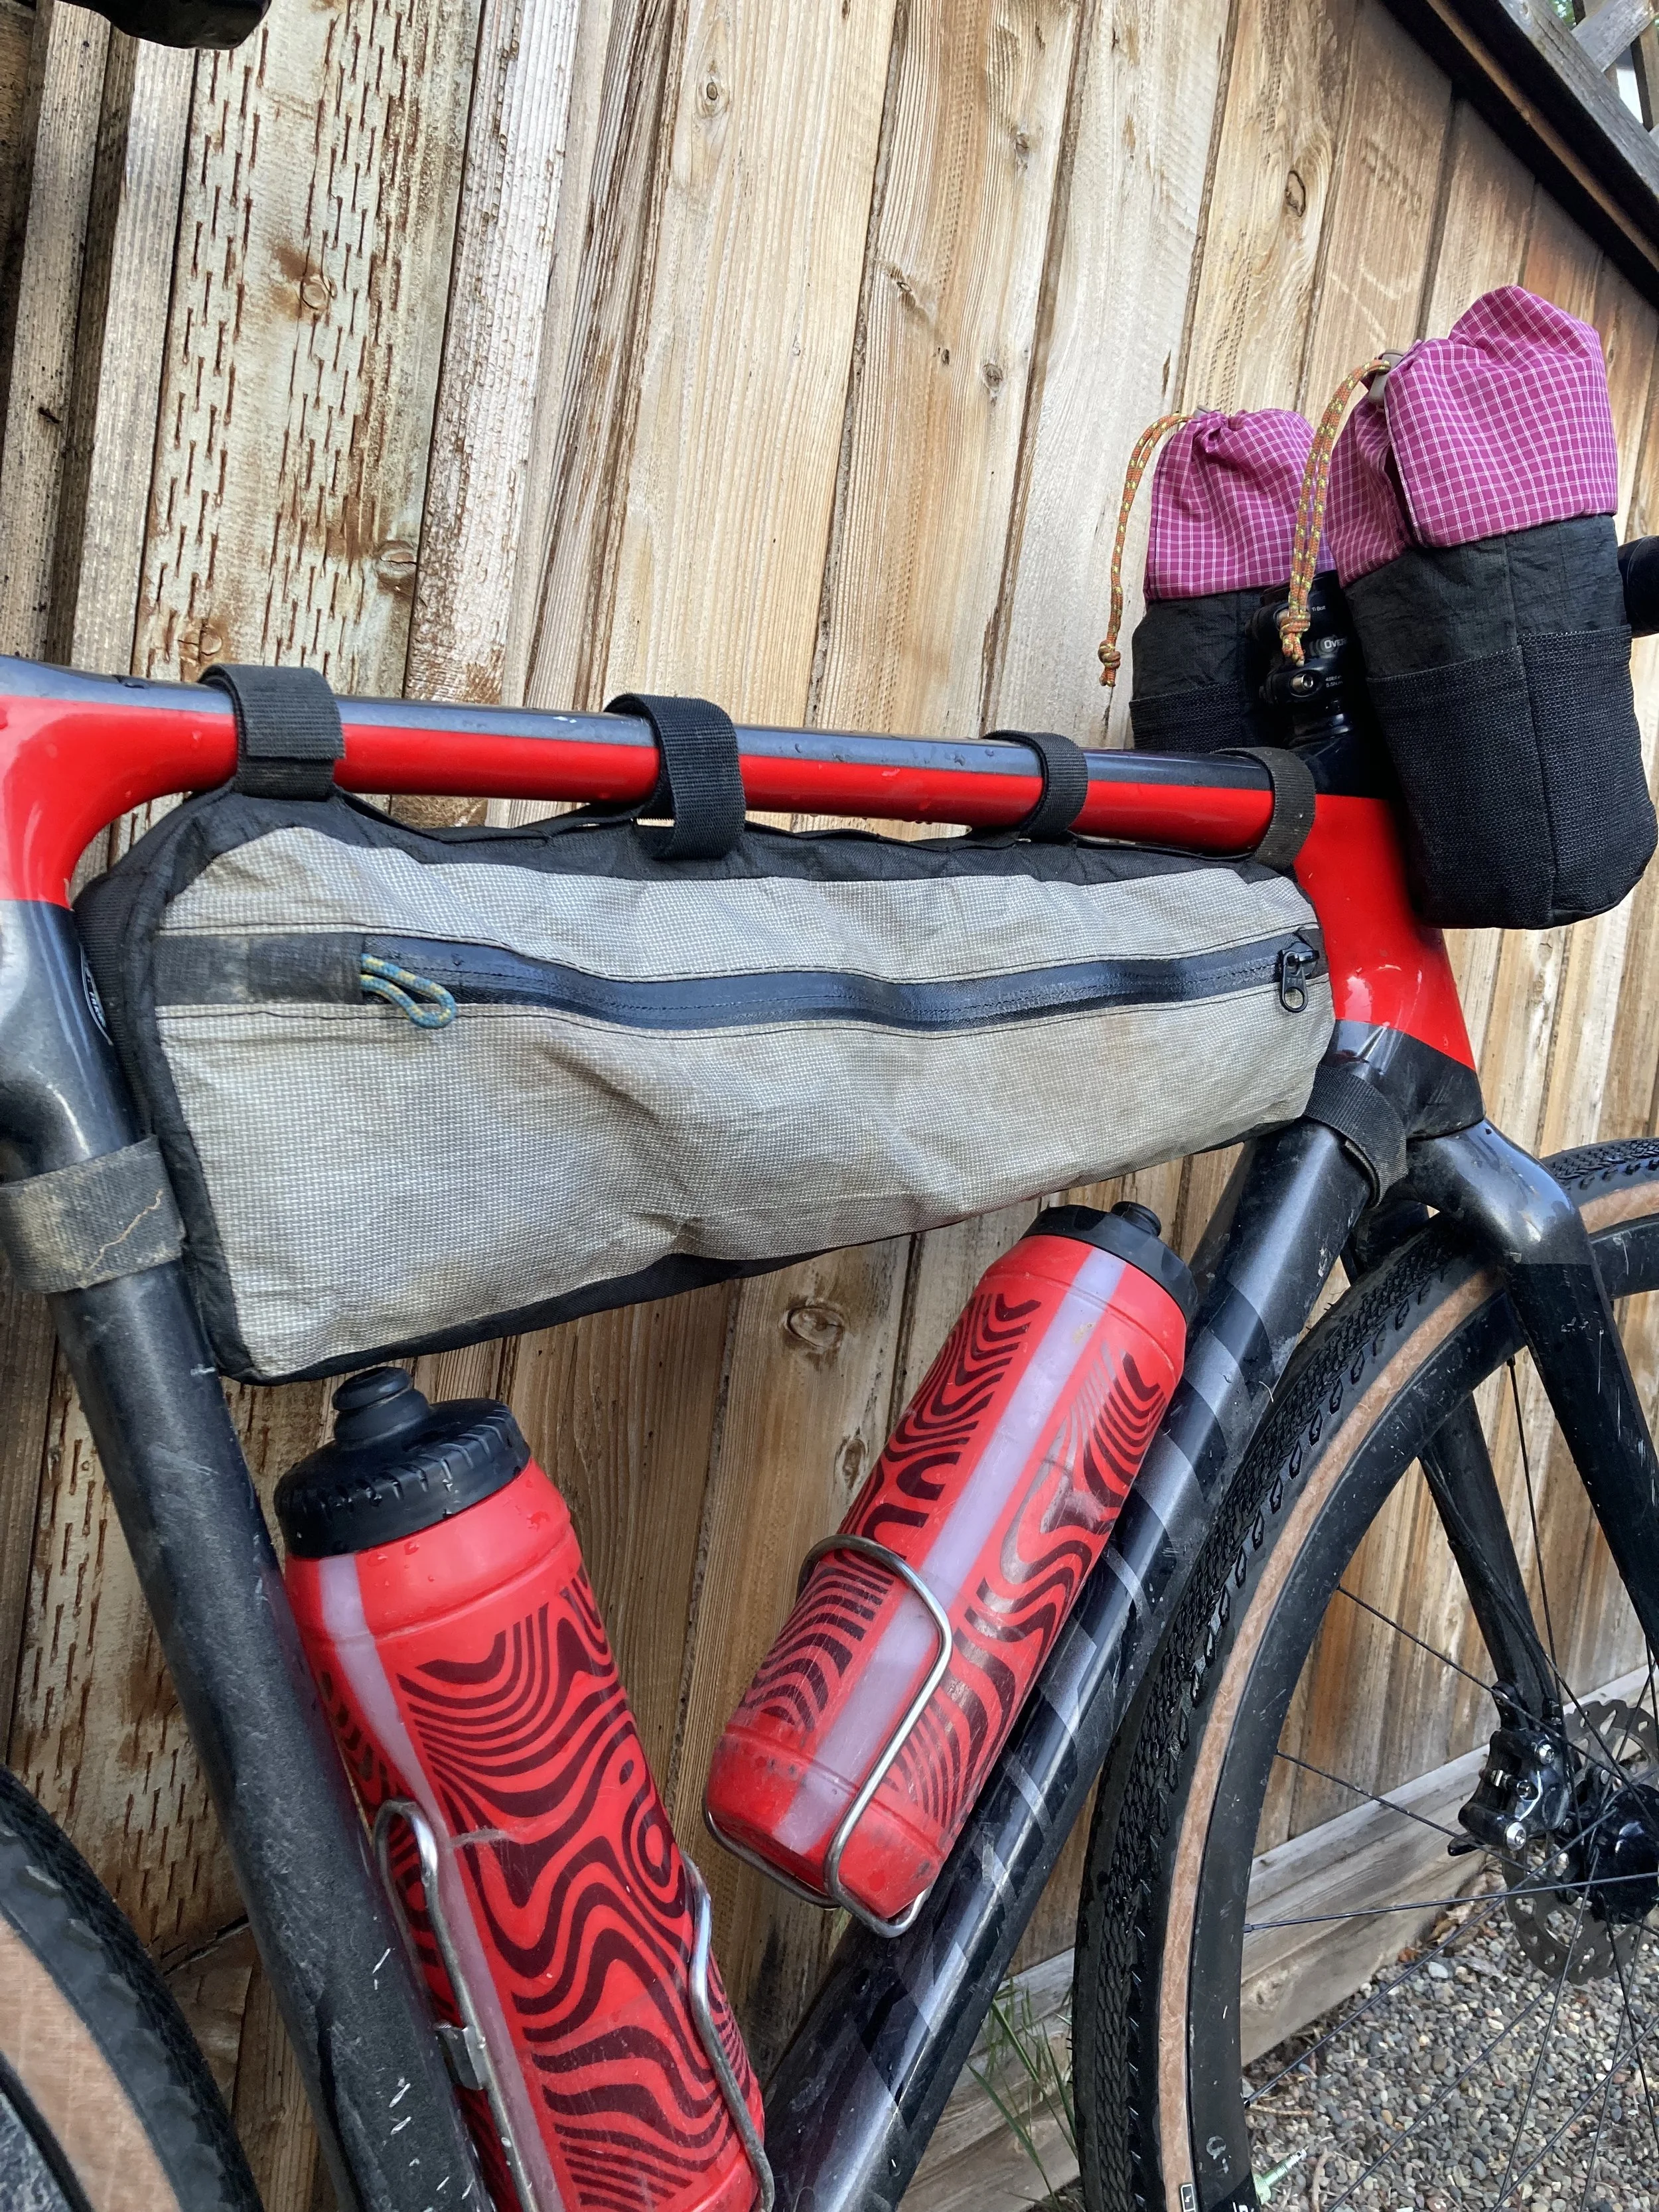
The bike’s main triangle is some of the most valuable real estate for bikepacking storage. A well-designed frame bag maximizes this space without interfering with the rider’s movement or comfort. Whether the goal is to fully utilize the entire triangle or just occupy a smaller section, careful consideration of fit, shape, and mounting is essential to maintain balance, accessibility, and ride quality.
Hydration Concept


My first frame bag was designed to accommodate a water bladder in the upper compartment, allowing for easy hydration while riding. Constructed from X-Pac, the bag featured two main compartments for organized storage and a side-access pocket for quick access to smaller essentials.
Upcycled Concept

Speed Concept
This compact frame bag was designed for ultralight performance, maximizing usable storage while preserving space in the bike’s triangle for two one-liter bottles. Constructed from Challenge Ultra, it features a single main compartment for core gear and a side-access pocket for quick access to smaller essentials.

A material exploration focused on repurposing an expired wing-foiling sail into a half-frame bag. The sail’s ripstop nylon construction offered both durability and visual character. The design aimed to preserve the original colors and panel patterns, celebrating the sail’s past life while giving it a new purpose as a functional cycling accessory.
Stem Bags
Stem bags provide easy on-the-go access to essentials like snacks, tools, or a water bottle while riding. Mounted between the handlebars and top tube, they make use of otherwise underutilized space without interfering with pedaling or steering. When designing stem bags, I focus on secure mounting, quick accessibility, and balanced proportions, ensuring the bag stays stable even on rough terrain.
Version 1

Versions one and two were tested extensively on rough terrain during multi-day bikepacking trips. After continuous use, I identified several areas for improvement:
The bags were difficult to open and close while riding, limiting on-the-go access.
Their bulk and height over the handlebars created unnecessary aerodynamic drag.
A missing bottom mounting point caused the bags to hang awkwardly and reduce stability.

Version 2

Version 3

More lightweight: Combined Challenge Ultra and Dyneema to reduce overall weight without sacrificing durability.
Easy access: Redesigned opening for one-handed operation, making on-the-go access simpler.
Aerodynamic profile: Adjusted dimensions to minimize bulk and maintain a sleek handlebar presence.
Improved mounting: Enhanced attachment points to prevent awkward hanging and ensure stability on rough terrain.
Top Tube Bag
Top tube bags are designed to provide quick, on-the-go access to essentials like snacks, a phone, or tools without requiring the rider to stop. Positioned along the bike’s top tube, these bags must balance easy accessibility, low weight, and minimal interference with pedaling or handling.
In designing this top tube bag, I focused on:
Ergonomic placement: keeping the bag within easy reach while riding.
Optimized volume: enough capacity for essentials without taking up excess space in the triangle.
Secure mounting: preventing movement or bouncing even on rough terrain.
Material selection: lightweight yet durable fabrics to minimize added weight while maintaining abrasion and weather resistance.
Protection for gear: added rigidity and foam padding to safely carry a small camera, ensuring it is shielded from shocks and vibrations during rides.
Prototype

Observations
During prototyping, I encountered several construction challenges: the curved edges combined with quarter-inch seam allowances made assembly difficult on my straight-stitch machine, especially with foam inserted between the exterior fabric and liner. Additionally, the bag tends to tip from side to side if the mounting straps aren’t tensioned correctly.
On the positive side, the foam provides excellent rigidity, allowing the bag to securely hold a point-and-shoot camera. While it has not yet been tested to failure, the design offers a stable, protective structure for sensitive gear during rides.
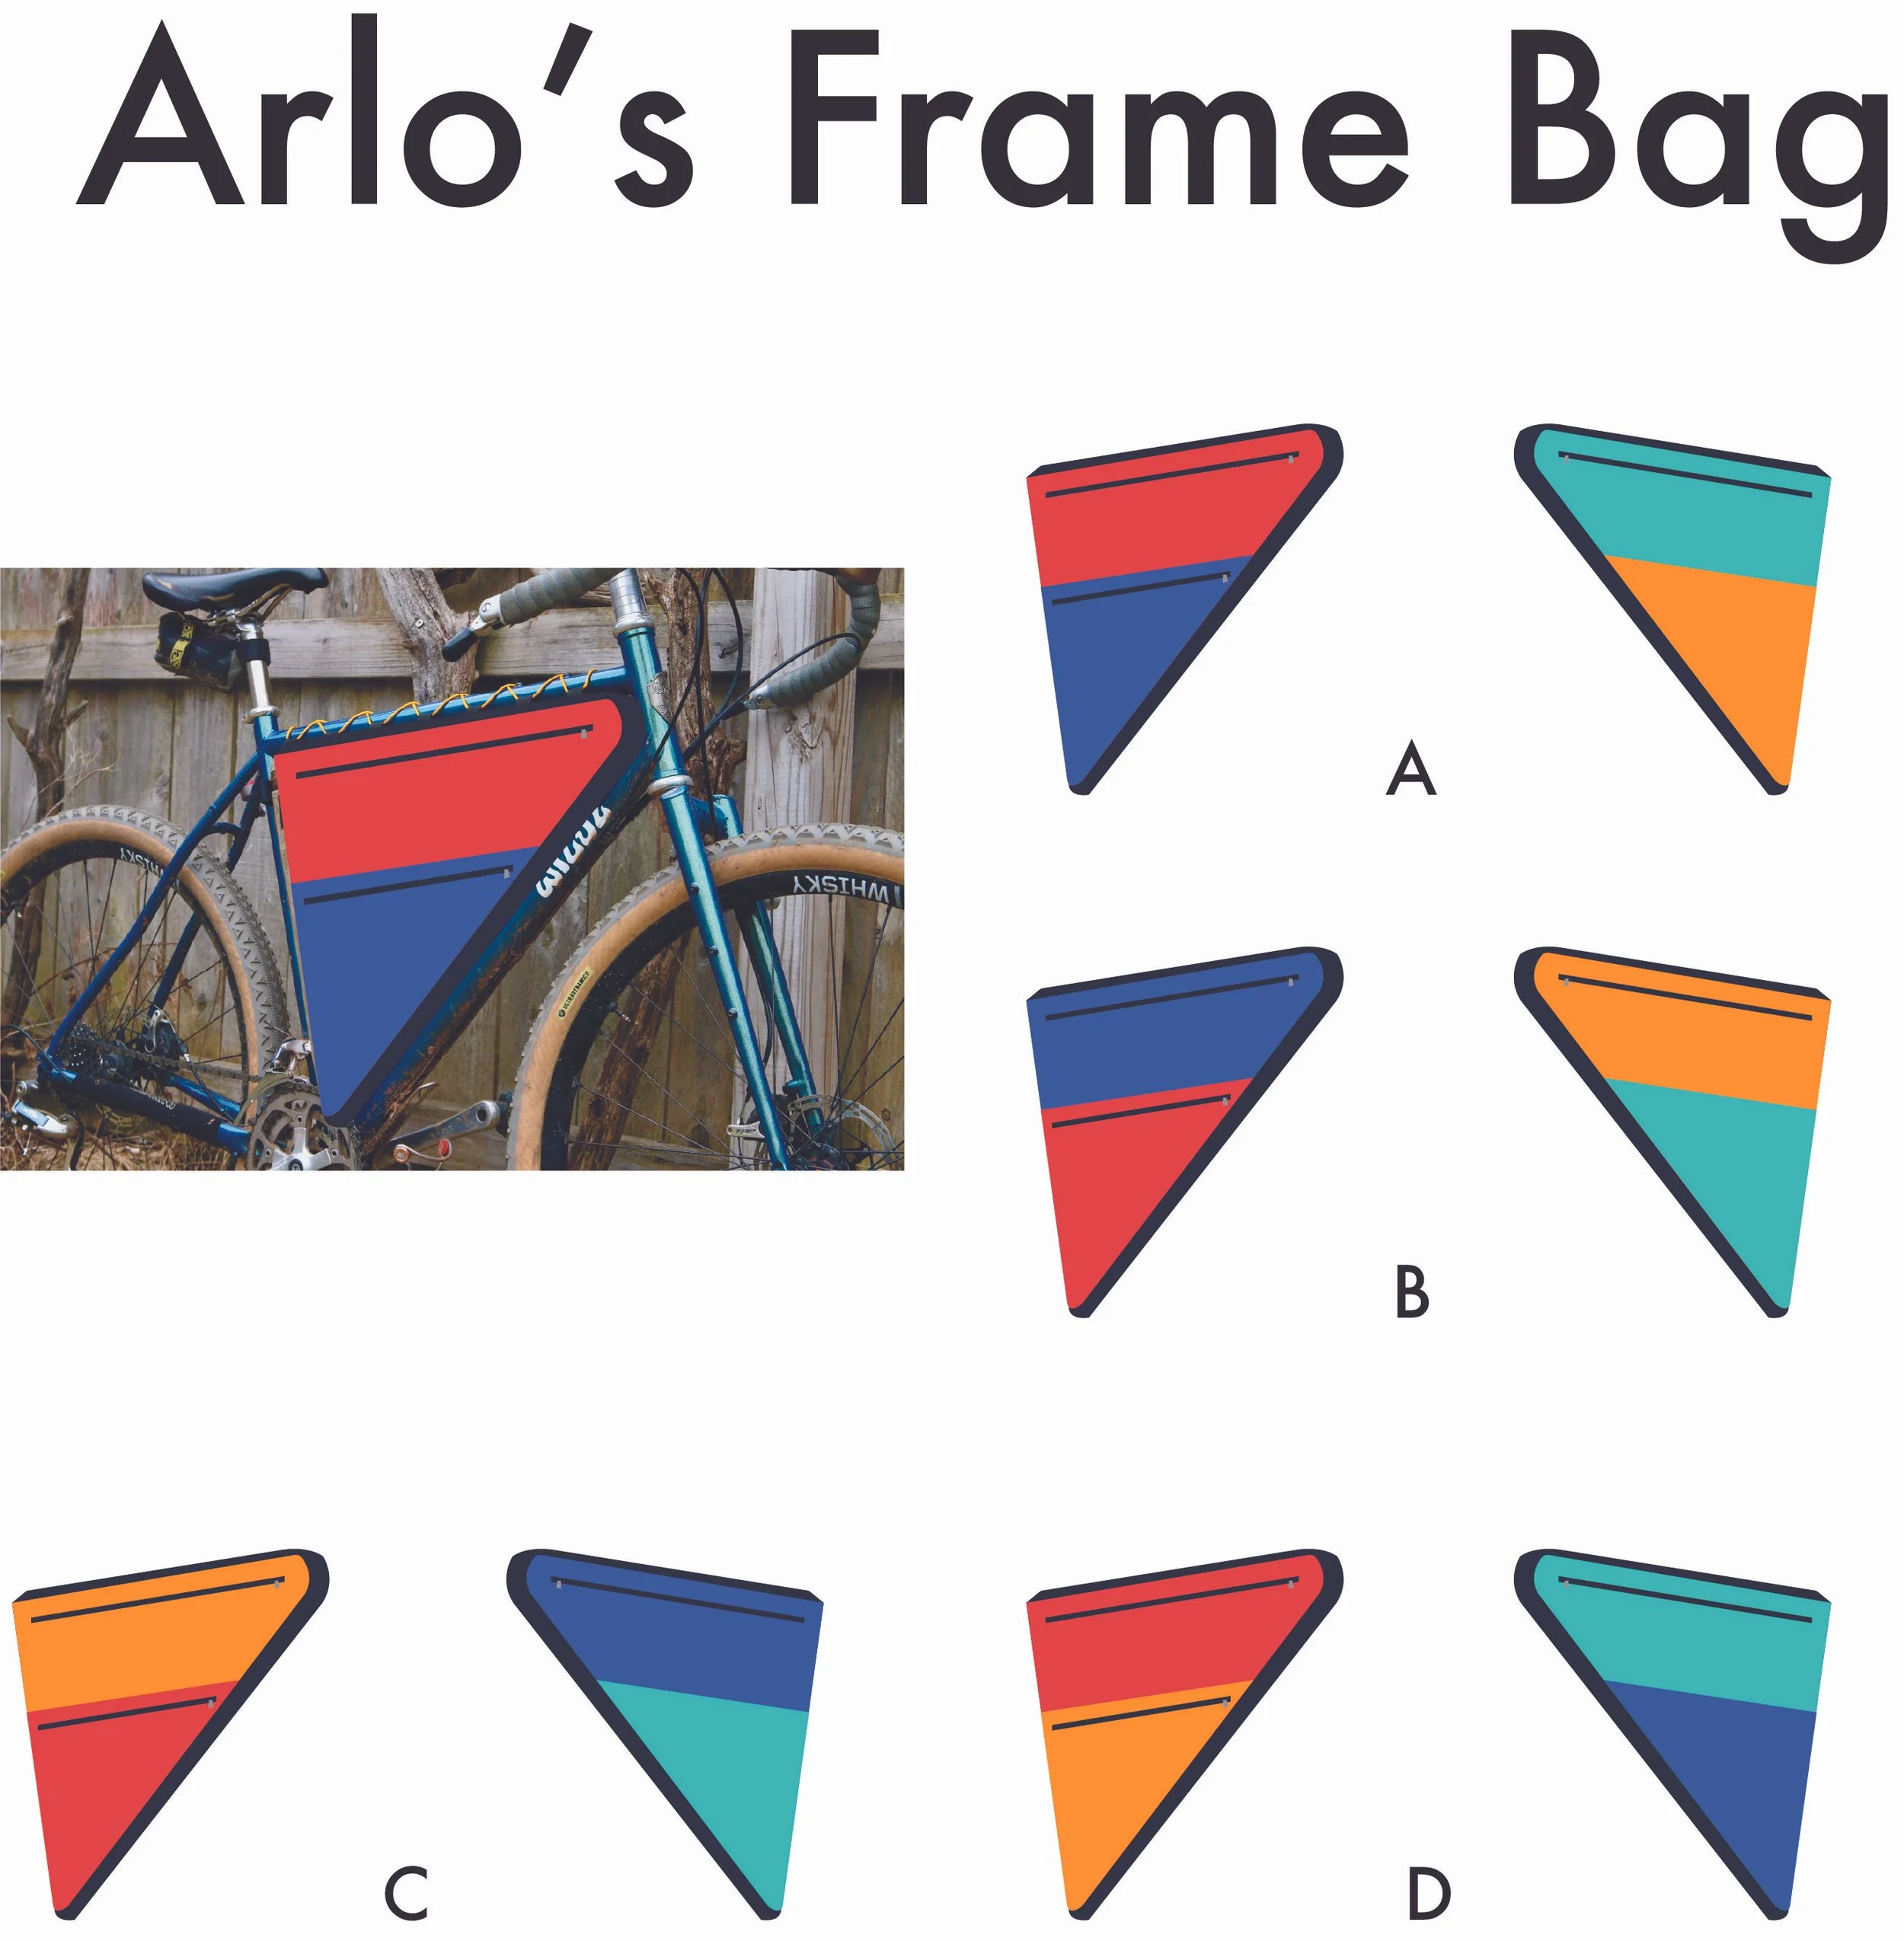
Comissions
At some point in my bike bag-making journey, people started asking me to make them custom bike bags. I’ve entertained a couple of those requests. My most recent request was from a regular at the coffee shop where I work. He wanted a colorful frame bag to complement his beautiful new Celilo bamboo gravel bike. I’ve done some work with Scott, the owner of the Celilo bikes, in the past, so I wanted to make the perfect bag so I could send him a picture of the finished result.
Arlo and I sat down to discuss his frame bag needs. I gave him a couple of ideas, and brought with me a couple of fabric samples. We drew up the bag and then went shopping for colorful X-Pac. Arlo gave me a mix of colors to include in the frame, so I mocked up various color combinations in Illustrator. I have been experimenting with rididity and foam, so I included that into the mix.
My biggest challenge when making this bag was the curves. We wanted the bag to fit the frame perfectly, and sewing curves on a straight stitch machine introduces a certain degree of error, especially with foam and thick materials. I learned a lot from the process, and ultimately, after a few tries, the end product fit the frame nicely and snugly.